#Attribution1 {display: none;}

Wednesday, July 31, 2013

Reptile themed birthday cake


Last week I had the pleasure of making a reptile themed cake for my youngest cousin. As much as I hate reptiles I thinks thats how much he loves it. I was fascinated by how much he knew about reptiles.He told me the difference between a crocodile and an alligator,a turtle and a tortoise,and also about the various kinds of snakes.The birthday was celebrated in a preserve and we got to touching many of the reptiles I had made for real. Which included a turtle,a cockroach as well as a snake and it was the first time my LO had touched a snake. This is one of the most detailed cake I have made so far and I truly had a blast making it. Not to mention I was doing the finishing touches at 3:45 am :). After seeing so many pictures of reptiles I think I could imagine things crawl at that time.When you like doing something guess time doesn't matter.Time just flies.

I have added a small tutorial of how to make the turtle. In case any of you are interested I could make more tutorials for the other reptiles.

My husband gave me one of the best gifts last christmas. I was given a budget to buy any thing baking related. Wow! I looked up on the internet and I found this lovely cake supply shop not too far away. For a baker like me just entering a cake supply shop is like paradise :) If you are anywhere close to Baltimore do check it out its called Kake Kraft Korner .My LO and I went berserk  in this cake shop of course for different reasons.. The owners were very friendly and I found everything I needed. I finally have a fondant tool set . I have also learnt the magic of tylose powder.

This cake was a two tiered vanilla cake filled and covered with chocolate butter cream. All the reptiles are made with homemade marshmallow fondant.

Chao! till we meet again.

Tuesday, July 2, 2013

Birthday cakes


Have you ever met people and felt you have known them for years even though you have lived continents apart all your lives. This post is to Thank you C. We both have LO's around the same age. Totally different personalities but I enjoy seeing them interact and the way we  can see each of them grow and the things they are able to do never fails to amaze me. Would be lovely to see what they turn out to be when they grow up.

Sometimes friends do the sweetest thing for you. C ordered 2 cakes from me and I felt so excited and priveleged as I have never ever been asked to make a cake . So heres a big Thank you for encouraging me this way :)One is for her husband and one is for her MIL. I get excited to hear when someone else loves chocolate. I always want to give them the best chocolate cake ever. I got the best compliment ever when C's MIL,she told me that she loved the cake and would always end up taking two slices when she wanted to take one. I am glad they loved the cake as I totally loved making it for them.

I still need to figure out how to make cute curls for lil girls hair. The lil girl on top of the Nani cake is supposed to be C's LO but I have not been able to do justice to her adorable locks.Anyway adios till the next post. Yes I am trying to learn Spanish :)

Friday, June 28, 2013

Storyville review


Its time for a review at DFC. Last week I went with my LO to Storyville . It is an interactive early learning centre attached to the Baltimore County Public Library at Rosedale and Woodlawn. I went to the Woodlawn branch. Wow what a place! If you have a kid between the age of birth to 5 and live any where close to this area its a must visit. Its FREE! Seriously I wish I became a kid again. I personally love designing for children. This place was like heaven for any child . I could so totally see both FABLE and Tink Tank in this space.

As I had mentioned in my earlier post my LO is in the phase of pretend play she totally had a ball. You could dress up as a doctor or a policeman. They had different spaces for a kitchen,washer room, construction area, grocery store, theatre. You name it they have it. They have developmental appropriate toys for age birth to 5 Everything to entertain your LO and keep them active. They also have an enclosed area where you could play with your little one who hasn't started walking yet.

I came back home telling my husband this is a kind of space I would like to design. I checked up online and figured out this place was designed by James Bradberry. Kudos to him and his team. They have done an amazing job.The staff at this place is very kind and helpful. They keep the place so clean considering there are over 50 kids buzzing around the place at a particular time.

The story time for babies was fun too. Very interactive with lots of props and music.
Over all a five star experience. I hope some of you get to enjoying this place with your kids.


Monday, June 24, 2013

Play dough


Play dough is so much fun to play for a 1 year old as well as a 100 year old. The texture makes it so nice and moldable.It can be squished, squashed, shredded, rolled, flattened, squeezed, poked, chopped  There is something so therapeutic about it and you can make your imaginations run wild. There is so much you can learn from it math,science, language and so many ways you can play with it. Just add in some sticks and  stones , pipes and pebbles,dal, pasta and feathers etc. It helps children improve there coordination and fine motor development

I remember making stuff with roti(bread) dough. Specially long snakes. My mother used to make these really cute fruits and veg with wax. With which we played our kitchen set. I am sure she must have burnt her hand while making those lil fruits. What all mothers do for their children. Thanks Amma!

There is something so cute about watching children's make belief play. My LO is at that phase right now and I can see all the little things she imitates from me and her dad. She loves making lemonade whenever in a restaurant and loves cleaning thats just like her dad. Cleaning is so not my department unfortunately. 

Pinterest is so full of recipes of these play doughs and my sis had tried making some and had recommended it . So I also decided to make some.Here is just one of the many recipes.

I think all of them are really good. Here are some lessons I learnt after making them.

1. These are really cheap and easy to make.
2. They last really long unlike commercial ones. My LO leaves the container open and it really doesnt dry that quickly.
3. I made four different colours . They looked really beautiful but it didn't take too long for my LO to mix all those colors and make it into one ugly colour. So maybe give them just one colour at a time or just let them have fun and don't bother. May be sub consciously they will learn about colour mixing :)
4. The recipe I followed recommended adding cinnamon. I personally wouldn't do it as it smells so good that you feel like eating it. Though its not toxic you don't want your kids to eat it.
5. Avoid using on carpeted flooring its quiet a pain to remove.
6. If you don't have a watchful eyes over your kids while they are having a blast with the play dough you will find them stuck under their toy truck or inside the dolls nose or God knows where.
7. Be careful not to play with it around your pets as you don't want them eating this as its just a lot of salt.
But seriously play dough is so much fun . Even I practice some of my figurines on play dough first and I can see my LO imitating me.

Thursday, June 20, 2013

Baby shower cupcakes


I am a lil late in putting up this pic. The baby is already here and we are looking forward to meeting the cutie pie. I am sure he is going to bring a lot of joy to the family. Unfortunately I wasn't able to attend this baby shower. But was very excited to make these cupcakes for the gorgeous mom to be. My LO has one more cousin to play with :) I can't help but write this baby's Ammachi will truly be missed.


Graduation Day cupcakes


\

Graduation is a special time of the year not only for the student but also for the parents teachers and friends and family.These are some cupcakes I made for my class I used to be in. I hope they enjoyed it as much as I enjoyed making it for them.
Every time I go to school I am reminded how blessed I am for the simple pleasures of life. This time when I went one of the students had so many family members come to cheer her as she graduated. Her dad told us that when she was born the doctors told them to take her home and love her as she was not going to be with them for too long. Look where she is now. We are so proud of each and every student that graduated that day. Each one of us has a lil story to share .Every time you are down eat a cupcake and count your blessings :)

Sunday, April 28, 2013

DIY Furniture


I love painting on furniture. I feel its something that can brighten up a room. We had this stool lying in our house for around 2 years and every time I looked at it I thought I needed to do something with it. There are times when you feel something is naked and you need to make it wear clothes. My daughter loves this stool as it was like her table. She would take support with it and walk when she was just learning. Its a multipurpose stool .So now that my daughter seems a lil bigger I thought I can make her paint her own furniture. I am sure she is very proud of it. Of course I am very proud of her.

So there are some steps you need to take while making kids do any painting and of course painting furniture.
1. Complete supervision. If your child is the type who puts everything in the mouth I wouldn't recommend it.
2. Make sure all the ingredients are non toxic. Usually the paint bottle will say non toxic.
3. Make sure your child is well fed and is in a good mood.
4.Make sure the place is well ventilated.
5. Have all your ingredients ready before hand . Dont leave her alone with the material ever.
6. She is going to get messy. Make them just wear there diapers or wear an apron.Do the activity over a mat as arylic paint can leave permanent marks.
7.Be prepared to stop the activity at any time.They might just get bored and run away 
8. Be sure to wash there hands several times with soap after the activity is done.

These are some tips I could remember if you have more tips add it to the comment box.

Okay I admit it most of the stuff was done by me but she helped me as much as those lil hands could. She is just one after all. 

Here is how we made it.

1. Cleaned the top of the stool well with a dish washing scrubber as I did not have a sand paper. I think it worked pretty well.
2. Paste stickers onto the stool.I had stickers of letters so thats what I put. 
3. Time to get messy. Squeeze the paint onto the stool and smear it all over.
4. Use a paint brush and give it a good second coat.
5. Let it dry for half an hour or longer.
6.Remove the stickers carefully.
7. We coloured the leg of the stool with crayons.
8. Wrote the capital letters on the side of the stool with permanent markers (sharpies)
9 Paint few coats of varnish over it or spray paint with craft spray.

Her first ever painted furniture is all set to show off to the world.


She also wanted to show her wow wow the table she painted

Monday, April 22, 2013

Bridal shower cupcakes

BRIDAL SHOWER CUPCAKE

BRIDAL SHOWER CUPCAKE

BRIDAL SHOWER CUPCAKE

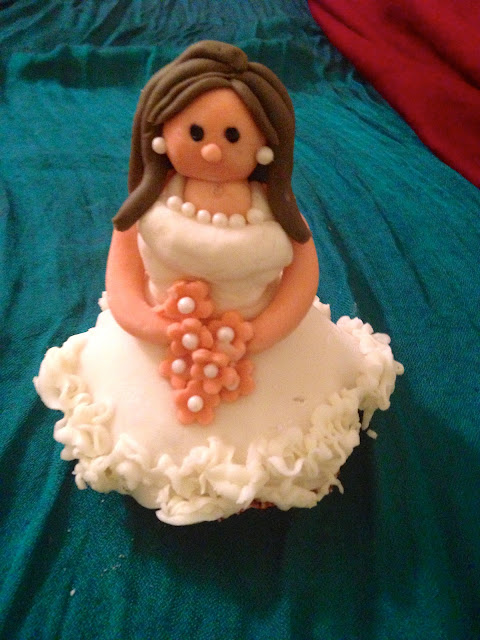
Who doesn't love attending weddings. Maybe the only time I didn't like attending them would be when people would come up to me and ask me when I am getting married. Weddings in America are so different from the ones in India. Indians are amused by the American weddings as much as Americans are amused by Indian wedding. I remember one of my colleagues in the US was shocked when I said I had around 600 people for my wedding. She was like ,So did you know all those 600 ppl . Ofcourse not.
We were very excited when we got the save the date card for my dear friends wedding. I wish I could share the picture. it is truly amazing a picture of the bride and groom under water in perfect harmony. And it was not photoshopped. I am sorry I can't explain how beautiful that picture is. Supposedly it took 3 hours to get that perfect shot and over 700 pictures.
Anyway I had a lovely day yday. Actually this was my first official bridal shower I was invited for. Enjoyed the yummy food it was truly very good and all the games were fun. I could feel the love and warmth of the family. Wishing the gorgeous couple a lovely journey ahead.
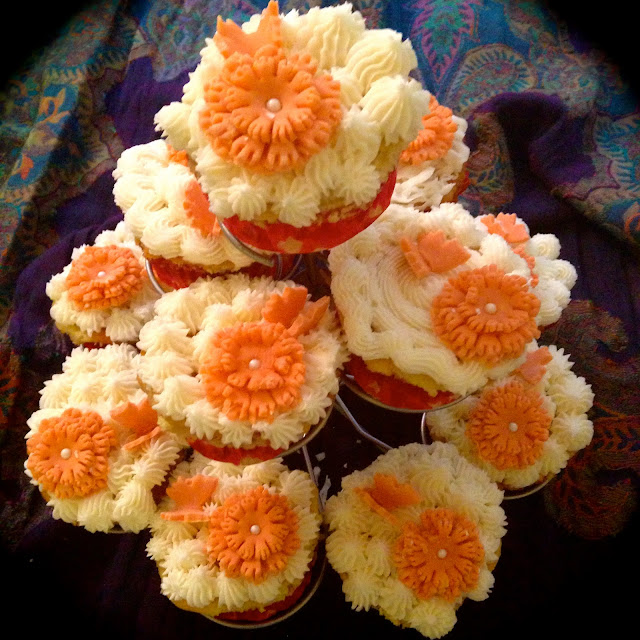
I hope you liked the cupcake.Its a hummingbird recipe vanilla cupcake.wilton buttercream frosting and home made marshmallow fondant

Saturday, April 6, 2013

Learning Technology


Girls Learning Code: Bring creations to life with electronics from Tunnel Media on Vimeo.

I am a new media designer by qualification. I love technology. I get a high when I am able to do a bit of coding.I remember while studying at NID I was one of the few people in my class who wasn't an engineer. I was very over whelmed. At one point I even wondered why they selected me . Though I am so happy they did.

While growing up if you were not an engineer or a doctor you were almost equal to nobody. Fortunately my parents didn't have that mentality. I feel if I was taught technology the way they teach in this video I would have surely been an engineer. I can hope my LO gets an opportunity to learn like this. Not that I want her to be an engineer :p I hope they continue designing and developing curriculums like this for children.

 Must say I have been working very hard on this blog. I know you might not be able to notice the subtle differences in my blog. But I have been busy hacking codes the last few days. Widgets for something as small as my signature, related post or a Pinterest button have taken me hours. I am not that smart when it comes to programming. But a big shout out to some really awesome people on the net who have made these codes available for free.

Some of the bloggers include
http://www.codeitpretty.com
This lady is simply fabulous. The way she gives instructions. I feel anybody who is able to read can follow her instructions.
http://www.carrieloves.com
Her designs are beautiful and have learnt so much from her.


Thursday, April 4, 2013

Personalised Name Boards


This was for one of our relative Neer. He was turning 1 an adorable lil baby. His name means water in Sanskrit
Stacya is our family friend. She is a beautiful professional ballet dancer.

My first student Devin. He loved John Deere. Must admit I had never heard of John Deere till I met him and once I met him I heard no end of it. I also wrote a poem of him and his John Deere tractor need to illustrate it.

Kory  loved Monster trucks and of course skulls.

Yoni loved planes

Antoinne loved to go bowling.

Cole loved his guitar. 

Siddarth is another sweet heart. Born and brought up in the US. Just wanted to include a touch of India to his room.


This was for my gorgeous niece Tayesha's  1st birthday. It was a ballerina themed b'day party. She looked like the perfect ballerina.


First of all am so excited about my two new followers Yipee Thank you ! I had quiet a few people coming to my blog today as I posted my blog on my facebook timeline. I was so excited with all the lovely comments. I am sure my husband would have seen me with an extra bounce in my step. I was just blushing :) Who doesn't like to be appreciated.Thank you once again. Hope I am able to stick to my commitment and come up with exciting posts.
Today's post covers some of the personalised name boards I made for my family,friends and some were middle school graduation gifts for my students.I would be so excited to see their reaction when they saw it.I feel there is something so nice to get a personalised gift. Something no amount of money can buy. There is a bit of you and a lil of that person in it.
I cannot post my favourite personalised name plate. It was for my favourite student ever. Unfortunately it has a picture of him and I don't want to get caught in legal issues:p. He looked a lot like Harry Potter and loved Harry potter too so I had superimposed his picture and written math magician.As he loved math. Miss all of my adorable students who taught me so much. Thank you.

Monday, April 1, 2013

Easter special


I hope you all had a great easter. We had a lovely easter with family and friends. Truly miss India though. I have spent most of my easters after leaving home with my uncle and his family. my aunt would have this huge spread for breakfast with sausage, bacon and eggs. Miss you all.

 So here are few things I made for easter. I decorated the easter eggs with a permanent marker and was inspired by Indian patterns. I made some chick sugar cookies  and decorated it with royal icing.The recipe for the sugar cookies is from country crock holiday cookies .
The bunny and flower bread recipe is from foodiva's kitchen. I like the name she gave to the bread its called Happy bread. This is supposedly a Bulgarian recipe and she took all the trouble to translate it. I loved the bread but I think next time I will add some garlic and may be parsley or oregano to jazz it up a bit.


Monday, March 25, 2013

Drawers makeover


The drawers I painted for my LO's clothes . Who was to know she was going to have a wardrobe bigger than mine. Its very useful since its close to her changing tables. I have her wipes on the top drawer so I can easily reach to it. Plus when I have to tell my husband where to find her stuff I can easily say its in the owl drawer, the butterfly drawer or the birdie drawer. It brightens our room up.
Every furniture in our house has a story to stay. Guess that's what happens when you live a students life. We got this ikea drawers from a moving sale and  I think now it looks much better just because there is a lot of love that has gone into it :)


Bookshelf makeover


This is the first thing I made when I knew I was going to have a LO. I didn't know if she was a boy or girl. So I wanted something neutral. Nature is always neutral. So this was a book shelf we got free while buying a TV from a moving sale. It was quite a rickety rackety book shelf. I mean it was something really basic. I knew it had lot of potential. Perfect place to keep the babies toys where one could access it easily as it was all open. I first made an outline with pencil. Then drew over it with sharpies(permanent markers)Then painted it with acrylic paint. I wasn't sure how long it would last. But well its been more than a year and it still looks just the same. So guess it works.


Sunday, March 24, 2013

Spring is here

Spring themed blue bulletin board


Spring is here and soon all the flowers will be in bloom. The tree outside my house which looked as though it was dead throughout winter has beautiful pink flowers. The birds are chirping and the bunnies are out too. Though we are still in our winter attire. Waiting to take my LO out to the park soon. These are some of the bulletin boards I made in school. Our school has 4 communities and I was a part of the blue community. The top pic was a board to welcome the students of the blue community. Used a lot of different textures in the board. The blue and white grass was some scrap fabric in the art room. We used pipe cleaners, wool, paper and pompom balls. The pic below was a bulletin board in our classroom. It was so much fun doing these bulletin board . I got a lot of help executing it. I do miss it. And I do miss the students and staff. Learnt so much out there.

Spring themed bulletin board for school with colourful flowers and says watch us bloom

Saturday, March 23, 2013

100th Post:)

Like a rose
Trampled on the ground
You took the fall
And thought of me
Above all

Since we are approaching Passion week and its my 100th post. I felt this was an ideal post for me to post. I made this for my mother in laws friends who are sisters.


Thursday, March 21, 2013

Tissue flowers


These cute tissue flowers can make any face festive. You can make lil ones and make a bouquet out of it. Or you can make huge ones and decorate a whole room.They are so easy to make and super cheap too.Here is a very good tutorial for these flowers.


Felt accessories


I enjoy making these lil hair accessories with felt. There is so much you can do with felt.
This is me having a felt obsession. These can be put on hair bands, clothes, bags, photo frames. I feel just adding one lil flower can make anything look cute :)